
In the whirlwind world of preschool education, where curiosity meets creativity at every corner, the power of crafts stands out as a beacon of imaginative exploration and developmental growth. As we dive into this comprehensive guide, "Top 34 Preschool Crafts Ideas for Preschool," we're not just presenting a list of activities, we're embarking on a journey into the heart of early childhood learning.
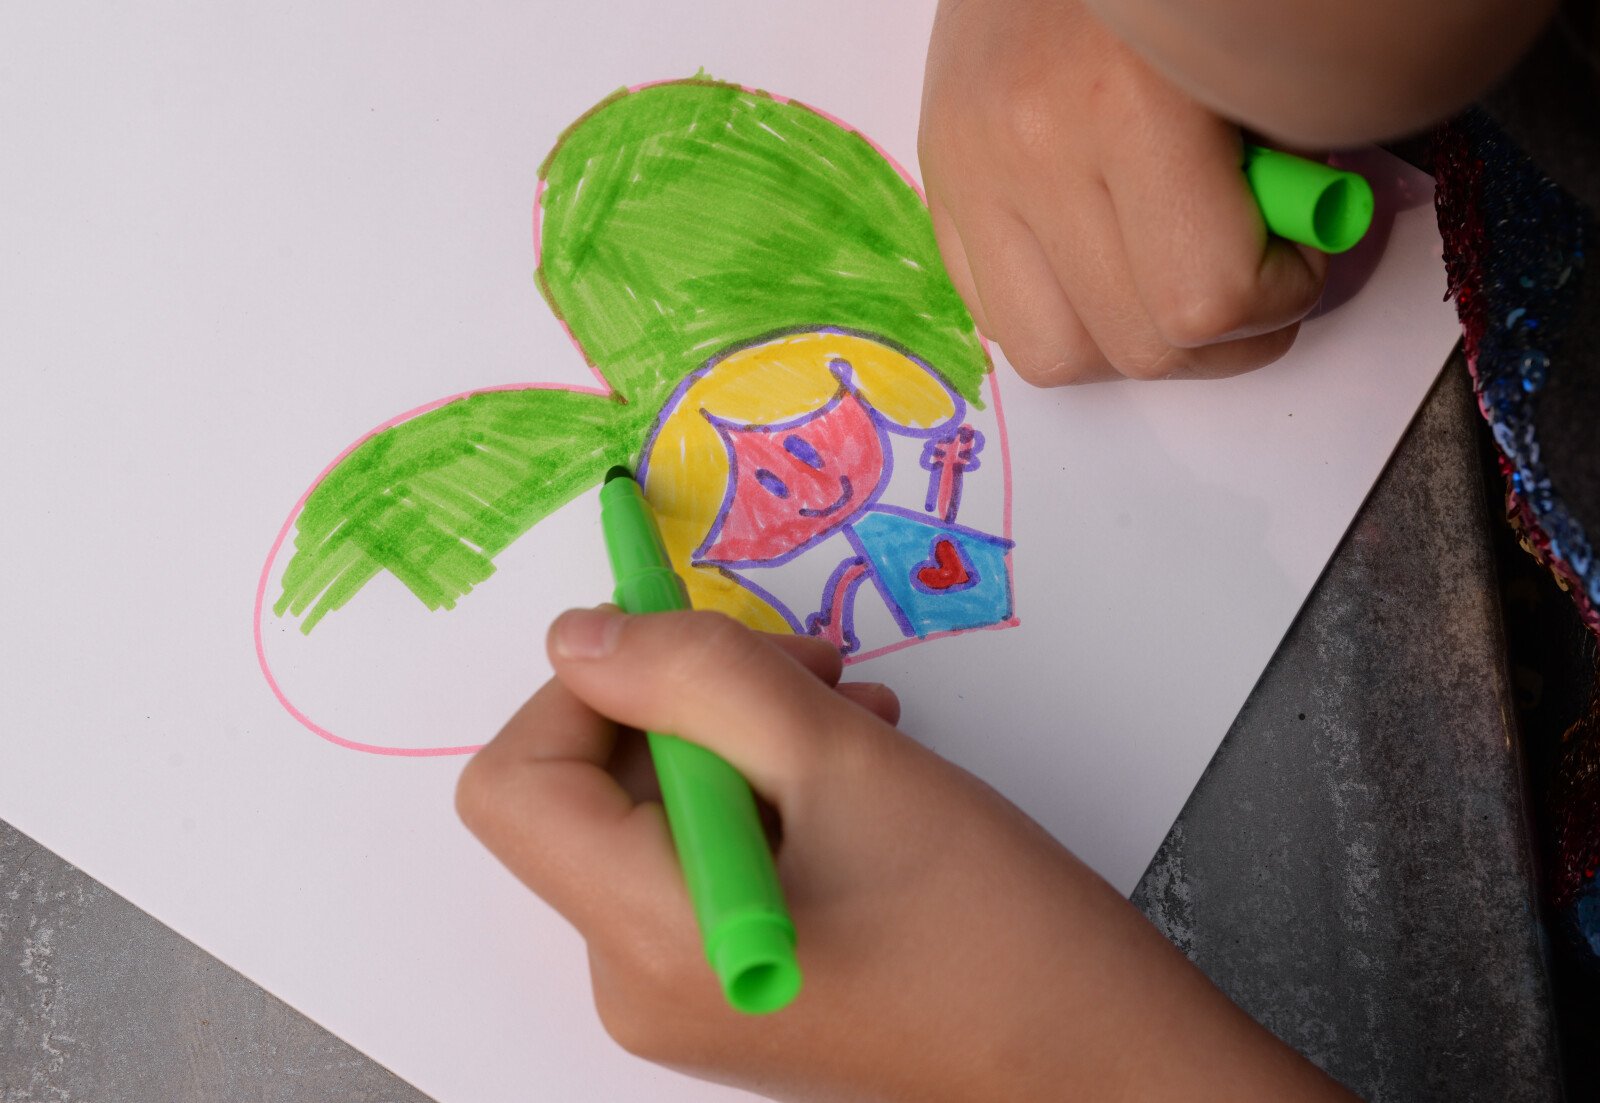
Table of Contents
What Are the Best Craft Ideas for Preschoolers?
- How can preschool crafts help with fine motor skills development?
- How can arts and crafts benefit preschoolers' creativity?
- What is the difference between crafts and art in preschool?
- What materials are commonly used in preschool crafts?
- Get 70+ Editable and Printable Templates for Almost Every Preschool Situation
What Are the Best Craft Ideas for Preschoolers?
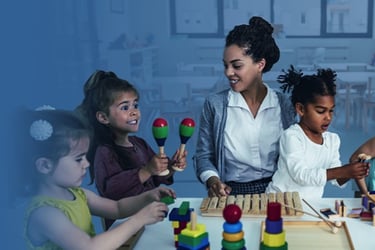
Crafting with preschoolers isn't just fun; it's a vital part of their learning and development. Engaging in preschool craft ideas can enhance their creativity, improve their fine motor skills and provide a wonderful opportunity for expression. Here, we explore 34 exciting preschool crafts that are perfect for little hands.

1. Paper Plate Faces
-
- Activity Overview: Preschoolers create their own paper plate faces, exploring emotions and expressions.
- Materials: Paper plates, markers, yarn, glue, assorted decorations (stickers, googly eyes, pom poms)
- Setup:
- Gather all materials and lay them out on tables where children can easily reach them.
- Ensure each child has access to a paper plate, markers, yarn, glue and decorations.
- Activity Instructions:
- Give each child a paper plate and encourage them to draw faces expressing different emotions (happy, sad, angry, surprised, etc.).
- Demonstrate how to use the markers to draw eyes, nose, mouth and eyebrows to create different expressions.
- Show children how to use yarn for hair by cutting pieces (or using pom poms) and gluing them onto the plates.
- Encourage children to use the assorted decorations to add unique features to their faces, such as stickers for freckles or googly eyes.
- As children work on their faces, discuss the different emotions and expressions they are creating. Ask questions like "What makes you feel happy?" or "When might someone make a surprised face?"
- Once completed, allow the faces to dry and then display them in the classroom or send them home with the children.
- Variations:
- Have children create faces representing characters from their favorite stories or people they know, like family members or friends.
- Use paper plates of different sizes to create a family of faces.
2. Nature Collages
-
- Activity Overview: Children explore the natural world by creating collages with found objects from nature.
- Materials: Cardboard or heavy paper, glue, natural materials (leaves, twigs, flowers)
- Setup:
- Before the activity, collect a variety of natural materials in a container. Ensure there are enough for each child to create a collage.
- Provide a workspace for each child with a piece of cardboard or heavy paper and glue.
- Activity Instructions:
- Take children on a nature walk to collect additional materials for their collages. Encourage them to look for a variety of textures, colors and shapes.
- Once back in the classroom, allow children to select items from the container of natural materials.
- Discuss the textures, colors and shapes of the different materials they have collected. Ask questions like "How does this leaf feel?" or "What color is this flower?"
- Demonstrate how to apply glue to the cardboard and arrange the natural materials to create a collage.
- Encourage children to fill their entire cardboard with natural items, creating a unique design.
- Once completed, allow the collages to dry and then display them in the classroom or send them home with the children.
- Variations:
- Focus on a specific theme for the collage, such as green leaves, colorful flowers or a particular shape.
- Have children create a scene or picture with their natural materials, like a tree or a butterfly.
3. Handprint Art
-
- Activity Overview: This activity lets children explore their creativity while making a personal mark with their handprints.
- Materials: Paint, paper, brushes or sponges.
- Setup:
- Set up a paint station with various colors of paint, brushes or sponges and paper.
- Ensure each child has a smock or old shirt to protect their clothing.
- Have water and paper towels nearby for cleaning hands.
- Activity Instructions:
- Discuss the concept of handprints with the children. Show them examples of handprint art and explain that they will be creating their own.
- Help children put on their smocks or old shirts.
- Demonstrate how to apply paint to the palm and fingers using a brush or sponge. Ensure the paint is not too thick or runny.
- Guide children to press their painted hand onto the paper firmly, creating a clear handprint. Help them lift their hand carefully to avoid smudging.
- Encourage children to create multiple handprints on their paper, using different colors.
- Once the paint is dry, show children how they can turn their handprints into animals, trees or other imaginative figures by adding details with markers or crayons.
- Display the finished handprint art in the classroom or send it home with the children.
- Variations:
- Use different objects to create prints, such as feet, leaves or cut vegetables.
- Create a collaborative handprint mural where each child contributes their handprints to a larger piece of art.
4. Craft Stick Puppets
-
- Activity Overview: Children use craft sticks to create their own character puppets.
- Materials: Craft sticks, colored paper, markers, scissors, glue, yarn and googly eyes.
- Setup:
- Prepare a workspace for each child with all the materials laid out for easy access.
- Ensure each child has a craft stick, colored paper, markers, scissors, glue, yarn and googly eyes.
- Activity Instructions:
- Discuss the concept of puppets with the children. Show them examples of different types of puppets and explain that they will be creating their own using craft sticks.
- Encourage children to choose a character or animal they want to create. It could be a person, a pet or a creature from their imagination.
- Demonstrate how to use the colored paper to cut out shapes for the body, clothing or features of their character. Help them glue these shapes onto the craft stick.
- Show children how to use the markers to add details like facial features, patterns or textures to their puppet.
- Help children attach yarn for hair or googly eyes to give their puppet more personality.
- Once the glue is dry, encourage children to use their puppets to tell stories or put on a puppet show.
- Variations:
- Create themed puppets based on a book the class is reading or a holiday that's approaching.
- Have children work in pairs or small groups to create a set of puppets that interact with each other.
5. Button Trees
-
- Activity Overview: A simple yet engaging activity where children create tree artwork using buttons.
- Materials: Green and brown construction paper, buttons of various sizes and colors, glue
- Setup:
- Cut out tree shapes from the brown construction paper, ensuring there's one for each child.
- Cut green construction paper into smaller pieces for the tree canopy.
- Lay out buttons of various sizes and colors on the table.
- Activity Instructions:
- Give each child a brown tree shape and a piece of green construction paper.
- Demonstrate how to glue the tree shape onto a larger sheet of paper.
- Encourage children to fill in the tree canopy by gluing buttons onto the green construction paper. Show them how to arrange the buttons by color, size or pattern.
- As children work, discuss the different colors and sizes of buttons they are using. Ask questions like "Why did you choose that color for your tree?" or "How many big buttons did you use?"
- Once completed, allow the button trees to dry and then display them in the classroom or send them home with the children.
- Variations:
- Create trees for different seasons, using yellow, orange and red buttons for autumn leaves or white buttons for snowy winter trees.
- Have children sort the buttons by color or size before gluing them onto their trees.
6. Tissue Paper Flowers
-
- Activity Overview: Preschoolers create colorful flowers using tissue paper, exploring textures and colors.
- Materials: Tissue paper in various colors, pipe cleaners, scissors
- Setup:
- Cut tissue paper into squares of various sizes. The larger the square, the larger the flower will be.
- Lay out the tissue paper squares and pipe cleaners on the table.
- Activity Instructions:
- Demonstrate how to create a flower by stacking several layers of tissue paper squares on top of each other.
- Show children how to pinch the center of the stacked squares and twist a pipe cleaner around the center to secure it, creating a stem.
- Help children gently pull apart the layers of tissue paper to create the petals of the flower.
- Encourage children to experiment with different colors and sizes of tissue paper squares to create a variety of flowers.
- As children work, discuss the textures and colors of the tissue paper. Ask questions like "How does the tissue paper feel?" or "What colors did you use for your flower?"
- Once completed, display the tissue paper flowers in the classroom or send them home with the children.
- Variations: Use different colors and sizes of tissue paper to create a variety of flowers.
7. Foam Mosaic Art
-
- Activity Overview: Kids will develop their fine motor skills and creativity by creating mosaic art using foam shapes.
- Materials: Foam sheets in various colors, scissors, paper, glue
- Setup:
- Cut foam sheets into small shapes and squares. Ensure there are enough pieces for children to make small mosaics.
- Provide each child with a piece of paper, glue and access to the foam pieces.
- Activity Instructions:
- Discuss the concept of mosaics with the children. Explain how small pieces of material are arranged to create a larger image or pattern.
- Show examples of mosaic art and encourage children to brainstorm ideas for their own mosaics.
- Optional: Have children sketch their design on the paper with a pencil or marker before gluing the foam pieces.
- Demonstrate how to apply glue to the paper and arrange the foam pieces to create the mosaic design.
- Encourage children to fill their entire paper with foam pieces, leaving minimal gaps between each piece.
- As children work, discuss the colors, shapes and patterns they are creating. Ask questions like "Why did you choose those colors?" or "What kind of pattern are you making?"
- Once completed, allow the mosaics to dry and then display them in the classroom or send them home with the children.
- Variations: Challenge children to create specific images or patterns or let them freely create their own designs.
8. Clay Pinch Pots
-
- Activity Overview: Children use their hands to shape and mold clay into functional pinch pots.
- Materials: Air-dry clay, paint, paintbrushes
- Setup:
- Provide each child with a ball of clay and a space to work.
- Ensure there are enough paint and paintbrushes for each child.
- Have water and paper towels nearby for cleaning hands.
- Activity Instructions:
- Demonstrate how to form a ball of clay and then press thumbs into the center to create a pot shape.
- Show children how to pinch and smooth the edges of the pot to create a smooth, even surface.
- Encourage children to experiment with different sizes and shapes of pots.
- As children work, discuss the texture and malleability of the clay. Ask questions like "How does the clay feel in your hands?" or "What happens when you press your thumbs into the clay?"
- Once the pots are complete, set them aside to dry completely. This may take a day or two depending on the thickness of the pots.
- After the pots are dry, children can paint and decorate them with various colors and designs.
- Once the paint is dry, display the pinch pots in the classroom or send them home with the children.
- Variations:
- Have children create different shapes instead of just pots, like bowls, cups or vases.
- Add texture to the pots by pressing objects like leaves, buttons or stamps into the clay while it's still soft.
- Use the pinch pots as part of a larger project, like a tea party or a plant pot for a classroom garden.
9. Nature Walk Bracelets
-
- Activity Overview: A fun craft that combines a nature walk with creativity, resulting in a wearable piece of art.
- Materials: Masking tape
- Setup:
- Cut masking tape into strips long enough to wrap around each child's wrist, plus a bit extra for overlap.
- Place a piece of masking tape around each child's wrist, sticky side out.
- Activity Instructions:
- Take children on a nature walk around the school grounds, local park or nature trail.
- Encourage children to look for small, flat natural objects like leaves, flowers and twigs that will stick to their masking tape bracelets.
- As children find objects, help them stick the items onto their bracelets. Ensure the objects are pressed down firmly so they adhere well.
- Discuss the textures, colors and shapes of the objects children find. Ask questions like "What color is that leaf?" or "How does that twig feel on your bracelet?"
- Once the nature walk is complete, help children seal their bracelets by folding the excess tape over the objects, creating a secure closure.
- Back in the classroom, have children share and compare their nature bracelets with each other.
- Variations:
- Use different themes for the nature walk, like collecting items of a specific color or type (e.g., only green objects or only leaves).
- Create nature crowns or necklaces instead of bracelets.
- Press the collected items between sheets of wax paper to create a nature collage that can be hung in a window.
10. Sock Puppets
-
- Activity Overview: Children transform old socks into playful puppets with personality.
- Materials: Old socks, buttons or googly eyes, yarn, fabric glue, felt
- Setup:
- Collect old socks from children, families or thrift stores. Ensure each child has at least one sock.
- Provide a selection of materials for decorating the puppets, such as buttons, googly eyes, yarn, felt and markers.
- Activity Instructions:
- Have each child choose a sock to transform into a puppet.
- Encourage children to plan out their puppet's features, like eyes, nose, mouth and hair.
- Demonstrate how to use fabric glue to attach buttons, googly eyes or felt shapes to create facial features.
- Show children how to cut and glue yarn to create hair or other decorative elements.
- As children work, discuss the personalities and characteristics they envision for their puppets. Ask questions like "What is your puppet's name?" or "What kind of voice do you think your puppet has?"
- Once the glue is dry, encourage children to put their hands inside the sock puppets and bring them to life.
- Have each child introduce their puppet to the class and share a bit about its personality and backstory.
- Variations:
- Create themed sock puppets based on storybook characters, animals or community helpers.
- Put on a puppet show where children can showcase their creations and practice storytelling skills.
- Have children work in pairs or small groups to create puppet families or sets of friends.
11. Alphabet Bead Necklaces
-
- Activity Overview: Combining literacy and craft, children create necklaces with beads that spell out words or their names.
- Materials: Alphabet beads, string or yarn, scissors
- Setup:
- Lay out alphabet beads on the table, ensuring there are enough of each letter for children to spell their names or chosen words.
- Cut lengths of string or yarn for each child, long enough to create a necklace that can easily fit over their heads.
- Optional: Wrap a small piece of tape around one end of the string to make it easier for children to thread the beads.
- Activity Instructions:
- Have each child plan what word or name they want to spell with their necklace.
- Demonstrate how to thread the beads onto the string, starting with the first letter of the word or name.
- Encourage children to double-check the spelling of their word as they work, ensuring the letters are in the correct order.
- As children thread their beads, discuss the letters and sounds they are using. Ask questions like "What sound does that letter make?" or "Can you think of another word that starts with that letter?"
- Once the word is complete, help children tie the ends of the string together to create a secure necklace.
- Have children wear their necklaces and share the words they spelled with the class.
- Variations:
- Create bracelets or keychains using the same technique.
- Have children spell out sight words, vocabulary words or theme-related words (e.g., colors, animals). If you're looking for sight word tools, we've built a few you can use.
-
-
- Use different colors or sizes of beads to represent different parts of speech or word families.
-
12. Watercolor Resist Art
-
- Activity Overview: Children explore the magic of watercolor resist techniques using crayons and paint.
- Materials: White paper, watercolor paints, brushes, white crayons
- Setup:
- Distribute a piece of white paper and a white crayon to each child.
- Set up a painting station with watercolor paints, paintbrushes and water cups.
- Activity Instructions:
-
-
- Have children use the white crayons to draw shapes, patterns or pictures on their paper. Encourage them to press firmly so the crayon wax transfers well.
- Discuss the concept of resist art, explaining that the crayon wax will resist or repel the watercolor paint, creating a unique effect.
- Demonstrate how to paint over the crayon drawings with watercolors, emphasizing the importance of using enough water to activate the paint.
- As children paint, they will see their crayon designs emerge through the paint. Encourage them to experiment with different colors and color mixing techniques.
- Once the paintings are complete, set them aside to dry.
- When dry, have children share their resist art with the class, discussing the colors and designs they created.
-
-
- Variations:
-
-
- Use different resist materials, such as oil pastels, masking fluid or stickers.
- Create themed resist art pieces based on seasons, holidays or curriculum topics.
- Cut the finished resist art into shapes and use them to create a collage or mobile.
-
14. Egg Carton Creatures
-
- Activity Overview: Transform egg cartons into imaginative creatures.
- Materials: Egg cartons, scissors, paint, pipe cleaners, googly eyes, glue
- Setup:
- Cut the egg cartons into individual cups or desired shapes, ensuring each child has several pieces to work with.
- Set up a painting station with paints and brushes.
- Provide a variety of embellishments for children to decorate their creatures.
- Activity Instructions:
- Encourage children to brainstorm ideas for creatures or characters they can create using the egg carton pieces. Discuss how they can use the different shapes and sizes of the cups to form body parts.
- Have children paint their egg carton pieces in the colors of their chosen creatures. Allow the paint to dry completely.
- Demonstrate how to use pipe cleaners, googly eyes and other embellishments to add features to the creatures. Emphasize the importance of using glue to securely attach the decorations.
- As children work, discuss the characteristics and habits of their creatures. Ask questions like "What does your creature eat?" or "Where does your creature live?"
- Once the creatures are complete and the glue is dry, have each child share their creation with the class and describe its unique features and backstory.
- Variations:
- Create a specific type of creature, such as aliens, monsters or pets.
- Use the egg carton creatures as puppets and put on a puppet show.
- Create a habitat or diorama for the creatures using a shoebox or other materials.
15. Yarn-Wrapped Letters
-
- Activity Overview: Develop fine motor skills and letter recognition by wrapping yarn around letter shapes.
- Materials: Cardboard, scissors, yarn, tape
- Setup:
- Draw large block letters on the cardboard, one for each child. Make sure the letters are thick enough to wrap yarn around easily.
- Cut out the cardboard letters carefully.
- Cut pieces of yarn in various colors, long enough to wrap around each letter several times.
- Activity Instructions:
- Give each child a cardboard letter and a selection of yarn colors.
- Demonstrate how to tape the end of the yarn to the back of the letter securely.
- Show children how to wrap the yarn around the letter, covering the cardboard completely. They should wrap tightly and close together, leaving no gaps.
- Encourage children to switch colors as they wrap, creating patterns or designs.
- As children work, discuss the shapes of the letters and the fine motor skills required for yarn wrapping. Ask questions like "What letter did you choose?" or "How does it feel to wrap the yarn around the letter?"
- Once the letter is completely covered, help children secure the end of the yarn to the back of the letter with tape.
- Display the finished yarn wrapped letters in the classroom or send them home with the children.
- Variations:
- Use different textures of yarn, like fluffy, sparkly or bumpy, to create sensory experiences.
- Wrap the letters in a gradient of colors, starting with light and moving to dark or vice versa.
- Create yarn wrapped numbers or shapes for a different focus.
16. Paper Weaving
-
- Activity Overview: Introduce basic weaving concepts with colorful paper strips.
- Materials: Construction paper, scissors, glue
- Setup:
- Cut a sheet of construction paper into a square for each child. This is the base of the weaving project.
- Cut slits from one edge of the square to about an inch from the opposite edge. The slits should be evenly spaced, about half an inch apart.
- Cut strips of construction paper in various colors, about half an inch wide and the same length as the square.
- Activity Instructions:
- Give each child a pre-cut square with slits and a selection of colored paper strips.
- Demonstrate how to weave the strips over and under the slits in the paper, starting at one edge and working across to the other.
- Encourage children to experiment with color patterns and sequences as they weave. They can alternate colors, create stripes or make random designs.
- As children work, discuss the weaving process and how the over-under pattern creates a woven fabric. Ask questions like "What happens if you change the pattern?" or "How do the colors look when they are woven together?"
- Once the weaving is complete, help children secure the ends of the strips to the back of the square with glue or tape.
- Display the finished weavings in the classroom or send them home with the children.
- Variations:
- Use different materials for weaving, like ribbon, fabric strips or even natural materials like grass or leaves.
- Create a collaborative classroom weaving by having each preschooler contribute a few woven rows to a large paper loom.
- Weave with paper of different textures or patterns for added visual interest.

17. Floating Chalk Prints
-
- Activity Overview: Children will discover the fascinating process of creating colorful prints using chalk and water.
- Materials: Colored chalk, water, shallow dish, paper
- Setup: Fill a shallow dish with water and have paper and chalk ready.
- Activity Instructions:
- Demonstrate how to grate or shave the chalk over the surface of the water. The chalk should float on top of the water, creating a colorful layer.
- Encourage children to experiment with different colors of chalk, watching how they interact and mix on the water's surface.
- Once the surface is covered with chalk, show children how to gently lay a piece of paper on top of the water. The chalk should adhere to the paper, creating a unique print.
- Carefully lift the paper off the water and set it aside to dry.
- As children work, discuss the science behind the floating chalk, such as water tension and the properties of chalk. Ask questions like "What happens when you mix the colors?" or "How does the print change if you use more or less chalk?"
- Once dry, display the chalk prints in the classroom or send them home with the children.
- Variations:
- Use tools like toothpicks or chopsticks to swirl and manipulate the chalk on the water before printing.
- Experiment with different types of paper, like colored construction paper or textured cardstock.
- Create a series of prints that explore color mixing or patterns.
18. Balloon Stamping
-
- Activity Overview: Using balloons as stamps, children can create colorful and unique artwork.
- Materials: Balloons, plates, paint, paper
- Setup:
- Inflate the balloons to a size that fits comfortably in a child's hand. They should be firm but not fully inflated to create a good stamping surface.
- Pour paint onto paper plates or shallow dishes, one color per plate.
- Activity Instructions:
- Demonstrate how to dip the balloon into the paint, covering the bottom half of the balloon.
- Show children how to gently press the painted balloon onto the paper, creating a circular stamp. Lift the balloon straight up to avoid smudging.
- Encourage children to experiment with different colors and overlapping stamps to create interesting designs.
- As children work, discuss the textures and patterns created by the balloon stamps. Ask questions like "What happens if you use more or less paint?" or "How do the colors mix when you overlap the stamps?"
- Once the paintings are complete, set them aside to dry.
- Display the finished balloon stamp art in the classroom or send it home with the children.
- Variations:
- Use balloons of different sizes to create variety in the stamped circles.
- Experiment with different objects for stamping, like bubble wrap, sponges or even fruits and vegetables.
- Create themed artwork by stamping balloons in specific color schemes or patterns.
19. Nature Suncatchers
-
- Activity Overview: Children create beautiful suncatchers using natural materials and clear adhesive.
- Materials: Clear contact paper, natural materials (leaves, flowers, etc.), scissors, hole punch, string
- Setup:
- Cut two pieces of clear contact paper for each child, about 6 inches square.
- Remove the backing from one piece of contact paper for each child and place it sticky-side-up on the table.
- Gather a variety of natural materials and place them in bowls or trays for children to access easily.
- Activity Instructions:
- Encourage children to select natural materials to create their suncatcher designs.
- Show them how to place the materials on the sticky side of the contact paper, arranging them in a design they like.
- As children work, discuss the colors, shapes and textures of the natural materials they are using. Ask questions like "Why did you choose those leaves?" or "How do you think the light will shine through your suncatcher?"
- Once the design is complete, remove the backing from the second piece of contact paper and carefully place it on top of the first, sealing the natural materials inside.
- Help children trim any excess contact paper from the edges, creating a neat square or circle.
- Use a hole punch to create a hole near the top of the suncatcher.
- Thread a piece of string or ribbon through the hole and tie it off, creating a loop for hanging.
- Hang the suncatchers in a sunny window and watch as the light shines through, highlighting the colors and textures of the natural materials.
- Variations:
- Create suncatchers with specific themes, like all leaves, all flowers or by color.
- Use pressed flowers or leaves for a flatter suncatcher design.
- Experiment with different shapes, like hearts or stars, for the suncatcher outline.
20. Fabric Scrap Collage
-
- Activity Overview: Children use scraps of fabric to create a textured collage.
- Materials: Fabric scraps, glue, cardboard or heavy paper
- Setup: Provide a variety of fabric scraps and a base for the collage.
- Activity Instructions:
- Children select and arrange fabric pieces on their base, exploring different textures and patterns.
- They glue the fabric down to create their collages.
- Discuss the different fabrics and the concept of collage as an art form.
- Variations: Incorporate other materials like buttons or yarn to add dimension to each preschooler's collage.
21. Pasta Jewelry
-
- Activity Overview: Children create their own jewelry pieces using uncooked pasta.
- Materials: Pasta (preferably shapes with holes, like penne), paint, string or yarn
- Setup: Lay out pasta, paint and string for children to access easily.
- Activity Instructions:
- Children can paint the pasta and let it dry.
- Thread the painted pasta onto string or yarn to create necklaces or bracelets.
- Discuss the concept of patterns and sequences as they create their jewelry.
- Variations: Use different types of pasta or add beads to the string for more variety.
22. Coffee Filter Butterflies
-
- Activity Overview: Using coffee filters and markers, children create colorful butterflies.
- Materials: Coffee filters, washable markers, water, pipe cleaners
- Setup: Flatten coffee filters and provide markers and a small amount of water for each child.
- Activity Instructions:
- Children color the coffee filters with markers.
- Spray the colored filters with water to allow the colors to blend and spread.
- Once dry, pinch the filter in the middle and twist a pipe cleaner around it to form the butterfly's body and antennae.
- Discuss the color blending process and the butterfly's anatomy.
- Variations: Don't forget to experiment with different color combinations or patterns.
23. Rock Painting
-
- Activity Overview: Children decorate rocks with their own creative designs.
- Materials: Rocks, paint, brushes, water
- Setup: Provide each child with rocks and a set of paints.
- Activity Instructions:
- Children can paint designs, patterns or creatures on their rocks.
- Once dry, these rocks can be used as paperweights, garden decorations or gifts.
- Discuss the concept of art in nature and how rocks can be a canvas.
- Variations: Introduce themes for the rock painting, such as seasons, animals or messages of kindness.
24. Tissue Box Monsters
-
- Activity Overview: Transform empty tissue boxes into fun and imaginative monsters.
- Materials: Empty tissue boxes, paint, construction paper, scissors, glue, various decorations (googly eyes, pipe cleaners, etc.)
- Setup: Set up a decorating station with all the materials laid out.
- Activity Instructions:
- Children can paint their tissue boxes and add features like eyes, teeth and antennae using construction paper and other decorations.
- Encourage them to name their monsters and create backstories for them.
- Discuss the use of different materials to create various textures and features.
- Variations: Create a whole monster family or a story where all the monsters interact.
25. Leaf Rubbing Art
-
- Activity Overview: Children create artwork using the natural textures of leaves.
- Materials: Leaves, paper, crayons
- Setup: Provide a variety of leaves, paper and peeled crayons.
- Activity Instructions:
- Children place a leaf under a sheet of paper.
- They use the side of a crayon to rub over the paper where the leaf is, revealing its texture and shape.
- Discuss the different patterns and textures of various leaves.
- Variations: Experiment with different materials for rubbing, like fabric or coins, to explore other textures.
26. Ice Painting
-
- Activity Overview: Children use colored ice cubes to paint and explore the effects of melting ice.
- Materials: Water, food coloring, ice cube trays, paper
- Setup: You'll need to freeze colored water in ice cube trays beforehand.
- Activity Instructions:
- Let children paint with the ice cubes on paper, observing how the colors blend as the ice melts.
- Discuss the process of freezing and melting and how it creates a unique painting technique.
- Variations: Add glitter or small objects to the ice cubes before freezing for additional effects in the artwork.
27. CD Fish
-
- Activity Overview: Upcycle old CDs by transforming them into shiny, colorful fish.
- Materials: Old CDs, googly eyes, construction paper, glue, markers
- Setup: Provide each child with a CD and materials for decoration.
- Activity Instructions:
- Children can use construction paper to create fins and tails, attaching them to the CD.
- Add a googly eye and use markers to add details.
- Discuss the concept of recycling and how old items can be repurposed into something new.
- Variations: Create an underwater scene with multiple fish and other sea creatures.
28. Paper Bag Puppets
-
- Activity Overview: Children craft their own puppets using paper bags and various decorations.
- Materials: Paper bags, construction paper, scissors, glue, markers, assorted decorations
- Setup: Set up stations with all the materials needed for the puppet-making.
- Activity Instructions:
- Children design their puppet's face on the bottom of the paper bag, which becomes the puppet's mouth when the bag is opened.
- Use construction paper and decorations to add features and clothing.
- Encourage children to create a character and story for their puppet.
- Variations: Host a puppet show where children can bring their characters to life.
29. Popsicle Stick Frames
-
- Activity Overview: Children create decorative frames using popsicle sticks.
- Materials: Popsicle sticks, glue, paint or markers, decorations (stickers, sequins, etc.), photo or drawing to frame
- Setup: Lay out popsicle sticks, glue and decorations.
- Activity Instructions:
- Guide children to glue popsicle sticks in a square or rectangle to create a frame.
- Once the frame is dry, they can decorate it with paint, markers and embellishments.
- Discuss the concept of framing and how it can highlight a photo or drawing.
- Variations: Create themed frames, such as holiday decorations or favorite colors and patterns.
30. Handprint Trees
-
- Activity Overview: Using their handprints, children create a tree to explore seasons or color mixing.
- Materials: Paint, paper, brushes
- Setup: Prepare paint in various colors and have paper ready.
- Activity Instructions:
- Children use their handprints to create the tree's leaves, using different colors for different seasons.
- They can paint a trunk and branches to complete the tree.
- Discuss the changes in trees through the seasons and how colors can represent different times of the year.
- Variations: Create a large collaborative tree where each child adds their handprint or explore color mixing by combining paints.
31. Shape Collages
-
- Activity Overview: Children learn about shapes by creating a collage.
- Materials: Colored paper, scissors, glue, shape templates or stencils
- Setup: Provide various colored papers and shapes for cutting.
- Activity Instructions:
- Children cut out shapes from colored paper and arrange them on a separate sheet to create a collage.
- They can explore how different shapes interact and create new forms when combined.
- Discuss the properties of shapes and how they are used in art and design.
- Variations: Challenge children to create a scene or object using only shapes or explore symmetry by creating mirrored shape designs.
32. Texture Exploration Boards
-
- Activity Overview: Children create boards to explore various textures.
- Materials: Cardboard or heavy paper, various textured materials (cotton, sandpaper, foil, fabric, etc.), glue
- Setup: Provide a range of textured materials and a base for gluing.
- Activity Instructions:
- Children choose different textures to glue onto their board, creating a tactile collage.
- Encourage them to touch and describe the textures, enhancing sensory development.
- Discuss the concepts of rough, smooth, soft and hard and how different textures are used in everyday life.
- Variations: Create themed texture boards, like natural textures or household objects, to deepen the exploration.
33. Marble Painting
-
- Activity Overview: Children use marbles to create abstract art.
- Materials: Marbles, paint, tray or box lid, paper
- Setup: Place a sheet of paper in the tray or box lid and have paints ready in containers.
- Activity Instructions:
- Dip marbles in paint and place them on the paper inside the tray.
- Children tilt the tray to roll the marbles, creating painted trails.
- Discuss the concept of movement and how it can create different patterns.
- Variations: Experiment with different paint colors or add obstacles in the tray to change the marble's path.
34. Clothespin Butterflies
-
- Activity Overview: Using clothespins and craft materials, children create butterfly figures.
- Materials: Clothespins, colored paper or tissue paper, pipe cleaners, markers, glue
- Setup: Provide all necessary materials on a craft table.
- Activity Instructions:
- Children decorate clothespins with markers to create the butterfly's body.
- They cut wings from paper or tissue and attach them to the clothespin.
- A pipe cleaner can be twisted to make antennae and glued to the clothespin.
- Discuss the parts of a butterfly and how they can use different materials to represent them.
- Variations: Encourage children to create different insect figures using the same materials for a broader exploration of entomology.
Crafts for Preschoolers FAQs
How can preschool crafts help with fine motor skills development?
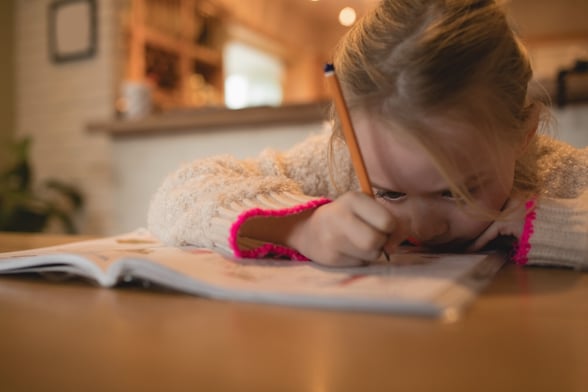
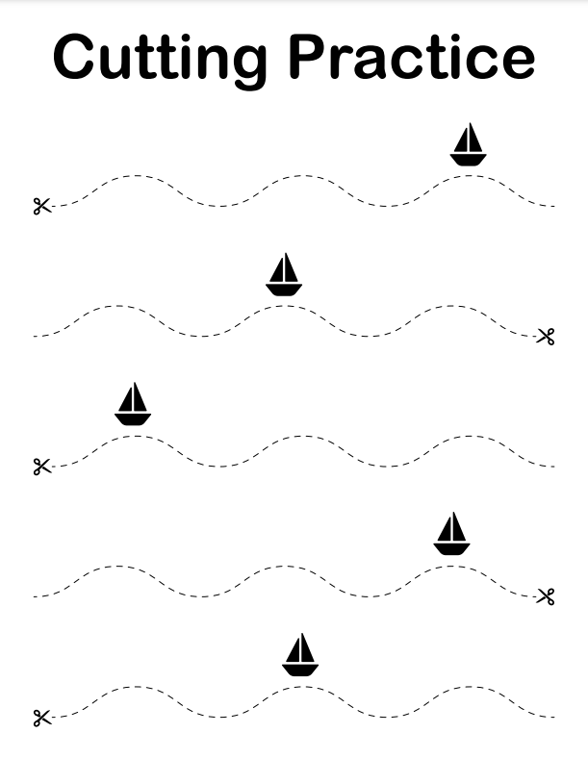
Engaging in crafts helps preschoolers develop their fine motor skills by using small muscles in their hands and fingers. Activities like cutting, gluing and drawing require precision and coordination, which are essential for later writing skills and daily tasks like tying shoes or buttoning clothes. If you're looking for activities to help with fine motor development, we've developed worksheets to provide educators with free materials and the best preschool management software available.
How can arts and crafts benefit preschoolers' creativity?
Arts and crafts provide a platform for preschoolers to express their thoughts, feelings and ideas in a tangible form. This expression through various mediums and materials fosters imagination, problem-solving skills and the ability to think outside the box.
What is the difference between crafts and art in preschool?
Crafts for kids are typically more focused on creating something specific, like a rainbow caterpillar or a homemade turtle, while art projects in preschool, or for kids of all ages, tend to be more open-ended. Crafts are often super easy and quick and easy to make, providing a fun activity for little ones. For example, a Thanksgiving turkey made from paper and cut leaf shapes is an adorable and easy-to-make craft that preschoolers will love making.
In comparison, art projects in preschool are more about creating something unique and exploring different materials and techniques. For example, making a jellyfish with tentacles made from noodle pom poms is a great way to encourage cognitive development and creativity. It also provides a fun and engaging activity for kindergartners to express themselves.
While crafts are a way to reuse materials like a circular plastic bottle to make a DIY turkey, art projects in preschool are more about exploring shapes, sizes and colors. Whether it's creating a Claude Monet-inspired painting or a pretend dough sculpture, preschoolers have the opportunity to express themselves creatively through art as well.
What materials are commonly used in preschool crafts?
Paper Towel or Toilet Paper Roll
Versatile items that can be transformed into binoculars, characters or even telescopes, encouraging imaginative play and storytelling.
Construction Paper
Ideal for cutting, folding and creating a multitude of projects, many preschool crafts require construction paper, a staple of these craft activities.
Paper Plates
Paper plates serve as a great base for masks, animals and seasonal decorations, offering a simple yet effective canvas for creativity.
Markers
Markers are perfect for drawing, outlining and adding details to craft projects, allowing for bold expression and fine motor skill development.
Yarn
Used in various projects like paper plate craft projects like faces and yarn-wrapped letters, yarn can enhance tactile experiences and is excellent for developing fine motor skills and exploring textures.
Glue
An essential component in many crafts, glue allows children to assemble and adhere different materials, aiding in their understanding of adhesives and the idea of permanence in art.
Scissors
Integral to developing fine motor skills, scissors are used in many projects for cutting paper, yarn and other materials, fostering precision and hand-eye coordination.
Paint
A versatile medium that lets children explore color, texture and expression. Used in activities like handprint art and rock painting, paint encourages sensory exploration and creative expression.
Brushes and Sponges
Tools that allow for different painting techniques, helping children understand various textures and effects they can create with paint.
Craft Sticks
Used in puppet-making and frame construction, craft sticks are excellent for building and creating structures, enhancing spatial awareness and engineering skills.
Buttons
Like in button trees, buttons help with sorting, pattern recognition and artistic design, offering tactile exploration and decision-making opportunities.
Tissue Paper
Used in making flowers or suncatchers, tissue paper introduces children to concepts of translucency, layering and delicate material handling.
Pipe Cleaners
Flexible and colorful, pipe cleaners are great for adding dimension and bendable elements to crafts, encouraging creativity and fine motor skill development.
Foam Sheets
Used in mosaic art, foam sheets offer a different texture and are excellent for cutting and design, promoting creativity and fine motor skills.
Beads
In activities like alphabet bead necklaces, beads aid in pattern creation and sequencing and are excellent for developing fine motor skills and recognition of letters.
Natural Materials
Natural materials, such as leaves, twigs and rocks, used in collages and rock painting, connect children with nature and teach them to use resources from their environment creatively.
Fabric Scraps
Employed in collage-making, fabric scraps allow children to explore textures and patterns, fostering creativity and sensory skills.
Cardboard
A sturdy base for projects like yarn-wrapped letters or texture boards, cardboard is versatile for construction and design, aiding in creativity and engineering skills.
Get 100+ Editable and Printable Templates for Almost Every Preschool Situation

We know preschools like yours are busy. That's why we made dozens of templates to help you manage the various aspects of your organization. With billing and invoicing, activity templates, forms and even marketing materials, we have it all. Download all 100 today!