


 In the past couple of years, the US saw a rapid decline in the number of religious people. A 2019 survey found that 65% of American adults are Christians. Compare this to the past decade when 77% of American adults identified as Christians.
Hosting a Zoom Bible study is a great way for churchgoers to find their way or stay on the path. Below, we’ve got a guide on how to conduct a Zoom Bible study. Keep reading to learn about the necessary online Bible study tools and more.
1. Go on Zoom and Learn the Basics
Before anything else, you first need to create a Zoom account. Zoom is available on both desktop computers and mobile phones.
You need access to your email for verification and an internet connection. If you’ll use Zoom on your smartphone, download the Zoom app from the store. If you’re going to use it on a computer, get the Zoom program from the Zoom website.
You can use Zoom without creating a Zoom account. However, you can’t invite others to Zoom meetings if you don’t have one. It’s also easier to create one so that you can customize your Zoom account.
To create a Zoom account, go to the official Zoom sign-up page at zoom.us/signup. Next, enter your age and email address. You can also select one of the offered sign-in methods for Apple, Google or Facebook.
Verify and activate your account when you check your email from Zoom. The message must come from no-reply@zoom.us. Click on Activate Account and start setting it up.
Enter your Zoom username and password. You can also invite other church members to join Zoom or skip that step. You can also set your Zoom preferences when you go to the Settings menu in the left panel.
Follow the same process if you’re planning to join Zoom via smartphone.
Why Use Zoom for Your Online Bible Study?
Zoom isn’t only for business and school use. It’s also a great tool for your religious practice. You can use it to hold Sabbath day gospels, weekly Bible studies, prayer services and more.
Some use Zoom to meet with members of the church who work in the Middle East or other Muslim countries. Many use it to hold a Bible study fellowship online to follow the steps for COVID-19 prevention. Plus, everyone can join the Bible study from the comforts of their home.
2. Set a Date for the Zoom Bible Study
Once you have your Zoom account prepared, it’s time to start planning your Zoom Bible study. The first thing you want to do is to agree upon a Bible study date. Open the topic to your Bible study group and ask when they want to hold the Zoom.
Others may want to hold the Zoom meeting at the usual time you have your Bible studies pre-pandemic. Some may have other priorities for that time now, so keep an ear out for that. For example, some parents may prefer to hold the Bible study a little after their kids’ bedtime.
If you are inviting a group of youths to join a Bible study, they may learn more when you hold it in the day. Kids’ brains are sharpest in the morning after a good night’s sleep and breakfast.
Whoever you’re having the Bible study with, try to work out the best schedule for everyone.
3. Decide and Plan the Study
The next thing you need to know is your agenda. What are you studying for this week’s Bible study? Find parts of the scripture that you’ll examine and what lessons the participants can get from it.
Find a passage and study it well. You may want to include relevant illustrations, especially if kids are joining. List down any experiences you’d want to share with the group that links with the study.
Add open-ended Bible study questions that everyone can answer. If you are a church or youth leader, you likely already got this covered. Finally, if there are other agendas that you want to talk about with your congregation, add them at the end.
This may include funding a church project or expanding the online group to other members.
As a tip, always plan the time for the entire meeting. You can also remove or add certain items from your list during the Bible study if you timed it wrong.
4. Send Out Zoom Invites to Interested Participants
You already learned how to create a Zoom account. You also have a schedule and lesson for the Bible study.
Now, your next step is to connect with the people who want to join it.
If you aren’t a Zoom user, the discussion about the schedule likely didn’t happen on the platform. You might’ve used other ways of communication like texts, a free church app, messaging apps or email. After everyone agrees to the Zoom meeting, tell them to set up their Zoom accounts if they want one.
If a member from the Bible study group doesn’t have the time or doesn’t want to make one, don’t worry. As we said earlier, you can use Zoom without having an account. All you need is to send them a link to the Zoom meeting.
You can invite people to a Zoom meeting in various ways.
Open and sign in to the Zoom Desktop Client first. Then start or join a meeting. On the meeting controls area, look for and click on “Participants.” At the bottom of the Participants panel, you’ll see the Invite button.
Sending Invites During a Zoom Meeting
If you want to invite a person to a meeting that is already in session, you can send it via email. Click the tab at the top that has the title “Invite by Email.” Below it, choose an email service provider, then add the participants and press send.
You can also use the Contacts tab on the Participants panel. Click on Contacts and look for their names from the window. After you select the people who want to join the meeting, click Invite.
The final way of inviting a person to the Zoom meeting in session is to click on Copy Invite Link or Copy Invitation. If you click on Copy Invitation, a full invitation text will get copied to your Clipboard.
You can then press Ctrl + V or Cmd + V when you’re chatting with or sending emails to a member you plan to invite. If you click on Copy URL, you’re only copying the URL for the Zoom virtual meeting. If you’re sending this out, add some context so people won’t think it’s a computer virus.
5. Inviting Participants to a Scheduled Zoom Meeting
This part will discuss what you need to do if you want to invite the Bible study goers to a scheduled meeting. You can use one of the two: the desktop client or the web portal. On your Desktop Client, schedule a meeting.
Click on “Meetings” and then select which meeting you want to invite the members to. Select the “Copy invitation” button and then send it out. The invitation will include the Zoom host’s (your) name and information about the scheduled meeting.
The other way of sending out a scheduled meeting is through the web portal. Open your browser and go to the Zoom web portal. Look for the “Meetings” menu in the navigation menu.
Next, select the topic of the meeting and then click on Time. You’ll see a couple of options pop up for adding your meeting to your Calendar. If you’re using Google or Yahoo Calendar, Zoom will create an event for it.
If you have a Microsoft account, the event will show up on your Microsoft Outlook Calendar. From here, you can send out invites to your contacts in your Yahoo, Google or Outlook accounts. Don’t forget to be creative in your messages when you send out your invitations.
6. Make Yourself Presentable for the Bible Study
Wear clothes you’d wear on a typical Bible study. You also want to look right at your laptop or computer camera when you talk. This way, the other participants will feel like you’re talking to them rather than to your screen.
Make sure that the lighting in the room is bright enough for the camera. You can sit in front of a window for natural lighting. You can also use a selfie ring light or video conferencing lighting kit.
The light must be on your face. Keep any sidelight or backlights off or out of the camera’s point of view. If you sit with your back to the window, you’ll end up looking like a shadow in the camera.
7. Things You Need to Consider When You Host a Zoom Bible Study
If you’re hosting an online community Bible study, make sure that others can hear you with clarity. To do this, get a headset or microphone and set it up on your computer. Even if you’re using a phone, a headset with a microphone can make your voice clear and remove background noise.
Speaking of microphones, ask other members to turn off their notifications or phones when in the meeting. Pings from their phones will get registered on the platform. It can be distracting, especially when everyone is doing a passage reading.
One of the features of Zoom is that it has a live chat feature for online meetings. This is for users who don’t have access to a microphone or camera. Don’t forget to check the chat feature often so you can see other members’ queries or concerns.
Another awesome Zoom feature is that it has a screen share feature. Use this if you prepared some illustrations or slides for the Bible study. Go to the meeting controls > Screen > Start Now to share your screen with the other members.
8. Tips for Overcoming Zoom Fatigue
One of the many issues with Zoom meetings is that it isn’t optimal for long-term use. Human beings communicate better in face-to-face conversations. You may also notice that the way you talk on Zoom differs from how you hold an in-person conversation.
Also, don’t forget that hours and hours of staring at a screen in a week can tire your eyes.
Meetings prolonged by off-topic conversations can cause more fatigue in the participants. Keep your Zoom meetings within the expected runtime by staying on the topic. Like we mentioned earlier, create an itinerary and stick to it.
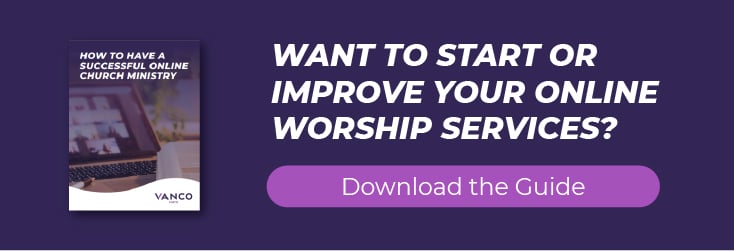
Get Expert Guidance for Free
Vanco has created a detailed resource that covers every aspect of setting up a virtual ministry. Click on the resource below to get your own copy!