
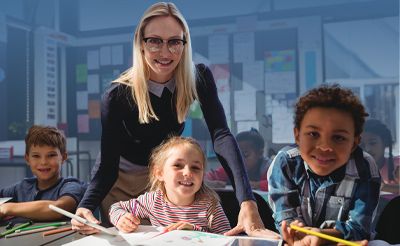

An "all about me" unit is a beloved classic in preschool classrooms around the world. These engaging activities encourage young learners to explore their unique identities, talents and personalities. From self-portraits to family trees, the "all about me" preschool theme provides ample opportunities for creative self-expression, skill development and confidence building. Get ready to embark on a journey of self-discovery with these 34 fun preschool activities!
Table of Contents
- What Are the Benefits of All About Me Theme Activities for Preschoolers?
- How to Incorporate Sensory Play into All About Me Theme Activities
- What Literacy Activities Can Enhance the All About Me Theme?
- How to Create Engaging Preschool Math Activities within the All About Me Theme
- What Science Activities Can Be Included in the All About Me Theme?
- How to Make Fun Self-Portrait Art Projects for Preschoolers
- Exploring Family Heritage and Cultural Identity
- Nurturing Emotional Intelligence and Self-Awareness
- Discovering Unique Interests, Talents and Dreams
- Building Positive Self-Identity and Confidence
- Get 70+ Editable and Printable Templates for Almost Every Preschool Situation
What Are the Benefits of All About Me Theme Activities for Preschoolers?

Incorporating an "all about me" unit into your preschool curriculum yields numerous developmental benefits for early learners. These preschool self-focused activities can help children to learn many different things and promote different physical and social-emotional skills.
Some of the benefits include:
Encourage Self-Expression
Arts and crafts like self-portrait projects or dream career drawings give preschoolers an outlet for open-ended self-expression. Children can showcase their individuality through creative choices like colors, designs and materials used. The freedom of imaginative outlets boosts creativity and confidence.
Develop Fine Motor Skills
Many "all about me" activities for preschoolers involve hands-on tasks like tracing, cutting, gluing and manipulating small pieces. From name collages to fingerprint art, these motor skill challenges build dexterity and hand-eye coordination vital for classroom skills like writing.
Promote Self-Confidence
Learning about unique traits, accomplishments and personalities is key to developing a positive self-concept from an early age. As they share their "all about me" projects, especially at the beginning of the school year, preschoolers gain confidence speaking in front of peers and take pride in who they are becoming.
With materials covering literacy, math, science, art activities and beyond, you'll find an amazing variety of engaging "all about me" activities to captivate preschool learners. Get ready to celebrate each child's one-of-a-kind identity and abilities through creative curriculum fun!
How to Incorporate Sensory Play into All About Me Theme Activities
Preschool teachers can incorporate sensory play into all about me-themed activities at the start of the school year to help children learn about themselves in a fun way. Use hands-on activities like manipulating playdough with cookie cutters or exploring a sensory table with foam letters for name activities. Use printable worksheets and lesson plans for math skills or incorporate a fun preschool science activity into the lesson. The goal is for kids to learn about themselves and the class as a whole, fostering a sense of self and building a classroom community.
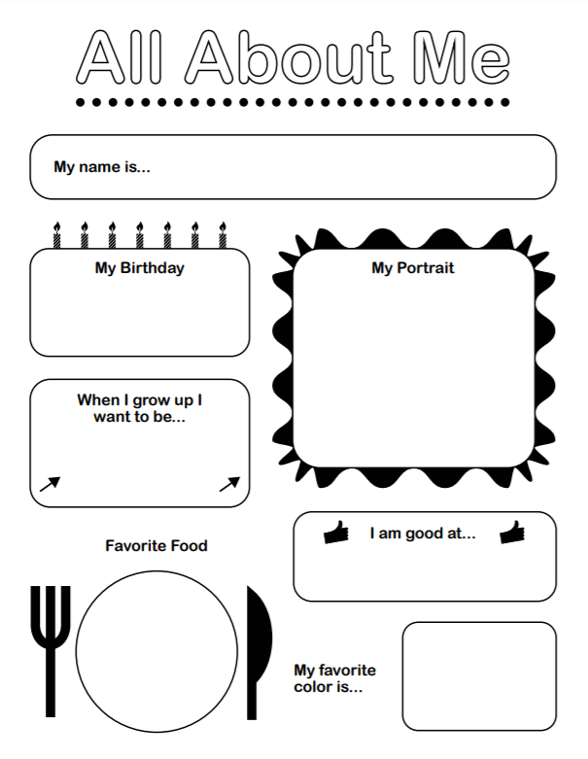
We'll dive into just a few of these activities, providing detailed instructions, but before we do, we want to provide printables, including a free "All About Me Form" and "All About Me Worksheets" you can use to make the process of these activities a little easier.

1. Sensory Bins with Body Part Themes
Overview: This body part identification game engages preschoolers' senses while learning about body parts through themed sensory bins filled with different textured materials.
Materials Needed: Plastic bins, filler materials (rice, beans, beads, etc.), plastic body part models or representations
Setup:
- Fill several plastic bins with different textured filler materials like rice, beans or beads.
- Hide plastic body part models or representations inside each bin.
Instructions:
- Introduce the sensory bins to the children, explaining they will explore the different materials to find hidden body parts.
- Allow children to reach into the bins and discover the buried body part models using their sense of touch.
- As they find each part, discuss what body part it represents and its function.
- Encourage descriptive language about the textures and how they feel.
Variations:
- Use filler materials with distinct scents for smelling activities.
- Incorporate simple counting or sorting of the found body parts.
- Play "I Spy" by describing a body part for children to locate in the bins.
2. Sensory Playdough Activities
Overview: Make homemade playdough in various skin tones and provide tools for creating textured self-portraits.
Materials Needed: Playdough ingredients, tools (googly eyes, straws, popsicle sticks), placemats or playdough trays
Setup:
- Prepare batches of playdough in advance using skin tone colors.
- Set out playdough, tools like googly eyes, craft sticks and placemats.
Instructions:
- Show children the different colored playdough and explain they will use it to sculpt portraits of themselves on a mat.
- Demonstrate how to use the tools to add facial features and details to the playdough.
- Children sculpt and mold the playdough into self-portrait shapes, using tools to texturize.
- Encourage self-expression and creativity in their playdough artwork.
Variations:
- Use lightly scented playdough or add essential oil scents.
- Provide mirrors for self-observation and detail accuracy.
- Incorporate loose parts like pipe cleaners or pom-poms.
3. Exploring Textures in Self-Portrait Art Projects
Overview: Create textured self-portraits using a variety of materials with different feels and textures.
Materials Needed: Cardstock or construction paper, glue, textured materials (yarn, fabric scraps, sandpaper, felt, foil, etc.)
Setup:
- On each child's paper, use a pencil to lightly outline a large circle or face shape.
- Set out the textured materials, glue and paper on tables.
Instructions:
- Show examples of textured portrait artworks using different materials.
- Explain children will create self-portraits by gluing textured items inside their outlined shape.
- Demonstrate how to tear, crumple or cut materials to add facial features.
- Children select materials and glue them within the outline to build textured self-portraits.
Variations:
- Provide materials representing diverse skin tones and cultural icons.
- Create full body outline shapes instead of just facial features.
- Use the textured portraits as inspiration for descriptive storytelling.
What Literacy Activities Can Enhance the All About Me Theme?
Building literacy skills is critical for preschool development and name-focused projects provide the perfect cross-curricular connections. Activities like letter sound bingo using eye color graphics or decorating name necklaces boost letter recognition in meaningful ways. Reading self-portrait stories also nurtures comprehension.
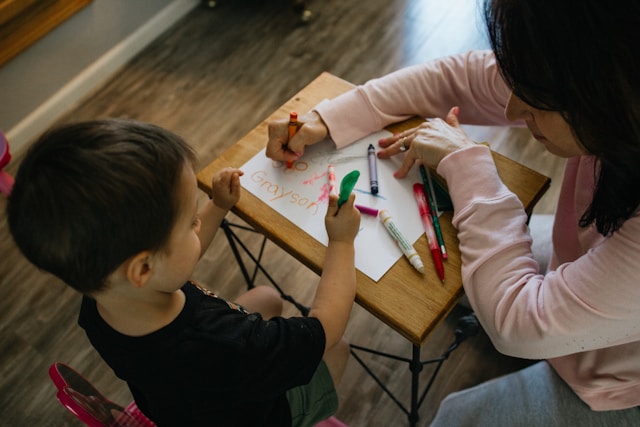
4. Tracing Letters in Their Name
Overview: Practice name writing skills by tracing dotted letter outlines with writing utensils. Children also practice how to spell their names.
Materials Needed: Paper with dotted letter outlines, colored pencils or markers
Setup:
- Print out papers with each child's name spelled using dotted letter outlines.
- Provide colored pencils, markers or other writing utensils at tables.
Instructions:
- Introduce the name tracing activity and its purpose for learning name spelling.
- Model how to trace along the dotted letter lines carefully with the writing utensil.
- Children practice tracing over the dotted outlines to write their name.
- Encourage proper pencil grip and stroke formation as they trace.
Variations:
- Use highlighters, wikki sticks or other materials for tracing utensils.
- Create blank tracing outlines for children to practice letter recall.
- Have children decorate their name practice pages with stickers or drawings.
5. Creating Name Collages
Overview: Make personalized name collages using cut-out letters from magazines and other materials. This preschool lesson is always a hit with preschoolers as they learn to recognize their names. Also, it's a fun activity idea for the beginning of the year to help children get to know classmates' names.
Materials Needed: Old magazines, child-safe scissors, glue, construction paper
Setup:
- Set out magazines, scissors, glue and construction paper at tables.
- Optional: Create letter shape templates from construction paper for tracing.
Instructions:
- Show examples of name collages to demonstrate the activity.
- Children search through magazines to find and cut out the letters needed to spell their first name.
- Glue the collected letter cut-outs onto construction paper to assemble their name collage.
- Add extra decorative elements using remaining magazine clippings or materials.
Variations:
- Use textured materials like fabric scraps, sandpaper or yarn for letters.
- Create letter shapes from playdough or stamp letters using inkpads.
- Extend the activity for longer names, including middle names.
6. Using Eye Color Bingo Games for Literacy Learning
Overview: Play bingo using specially designed cards with letters and graphics representing different eye colors. Fun activities like this one help children get to know different characteristics of themselves and their classmates.
Materials Needed: Eye color bingo cards (letters and graphics), bingo markers/stamps
Setup:
- Print out the eye color bingo card sheets, ensuring enough for all players.
- Gather bingo markers, chips or stamps for children to use.
Instructions:
- Introduce the bingo cards showing letters alongside eye color graphics.
- Explain players will listen for letters called and find matching eye colors.
- Call out letters and have children place markers on matching letters/colors.
- First player with a completed row or diagonal calls "Bingo!" and wins.
Variations:
- Use different physical traits like hair color or skin tone on the bingo cards.
- Trade cards to learn peers' names and create more letter recognition.
- Use real objects like colored pom-poms instead of graphics.
How to Create Engaging Preschool Math Activities within the All About Me Theme
From fingerprint counting to body part math races, these activities integrate core math skills like number sense, one-to-one correspondence and simple operations with imaginative concepts and theme ideas tied to student's physical selves. The age-appropriate, relatable approaches make abstract concepts like measurement more concrete.
7. Math Races Using Different Body Parts
Overview: Get bodies moving through active math exercises using body part cards with numbers or operations.
Materials Needed: Body part cards (numbers or simple operations), masking tape
Setup:
- Create a simple start and finish line area using masking tape.
- Make body part cards showing numbers, operations like +/- or answers.
Instructions:
- Model racing across the area while doing body movements with parts shown on cards.
- Call out a simple math problem using the body part cards (ex: "Arms 5 + Legs 3").
- Children solve the problem, then race while doing motions for each body part.
- First child to cross the finish line with the right answer movement wins.
Variations:
- Adjust difficulty by incorporating multistep problems or larger numbers.
- Set up a relay race format with two team lines instead of individual races.
- Use movements beyond just body parts for extra physical challenges.
8. Fingerprint Counting Activities
Overview: Use fingerprints to practice counting skills through one-to-one correspondence activities.
Materials Needed: Paper, stamp pads or non-toxic washable ink pads, counting objects
Setup:
- Set out paper and ink pads at each child's spot at the tables.
- Provide counting objects like plastic bears, cubes or buttons.
Instructions:
- Model using an ink pad to make fingerprints on the paper, counting one print per finger.
- Children take turns making fingerprint sets on their papers and counting how many.
- Use the counting objects to practice one-to-one correspondence with printed fingerprints.
- Challenge children to make fingerprint patterns or designs to count.
Variations:
- Introduce sorting elements by using different colored ink pads.
- Have children stamp with primary colors then blend the prints to explore color mixing.
- Use the fingerprints as a basis for creating fingerprint characters or stories.
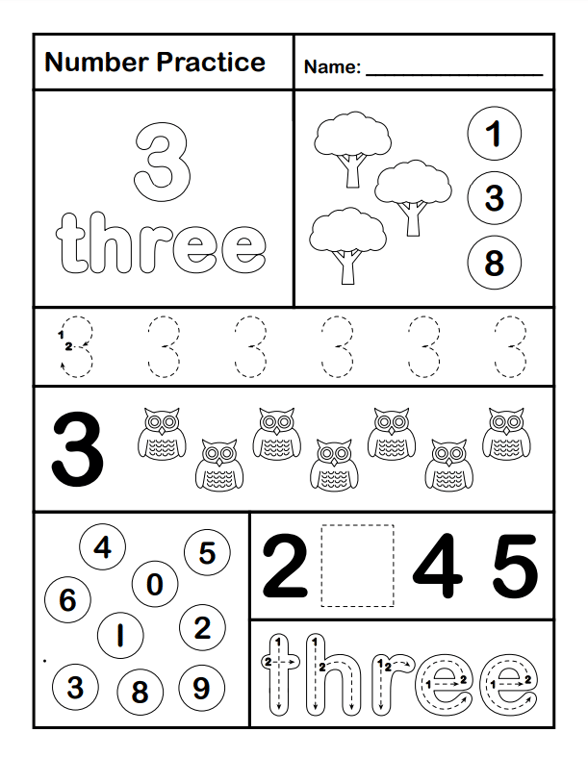
9. Math Worksheets
Math worksheets are a fun and easy way to get kids involved. All you need to do is print the materials, offer instructions and pass them out. Click below to access them.
What Science Activities Can Be Included in the All About Me Theme?
Incorporating science experiments and explorations focused on human characteristics helps make your science curriculum personal and engaging. Preschoolers investigate physical traits like hair samples reacting to food coloring or create collages categorizing objects by properties like living/non-living. The hands-on learning nurtures scientific curiosity.
10. Exploring Hair Color Science Experiments
Overview: In this fun science activity, children investigate the chemical reaction between food coloring and hair samples of different colors and textures.
Materials Needed: Samples of different hair colors/textures, food coloring, clear cups/containers, pipettes or plastic droppers
Setup:
- Collect small hair samples (from hairbrushes) and place a few strands in each clear cup.
- Set out food coloring bottles and pipettes or plastic droppers.
Instructions:
- Show the different hair samples and explain they will apply food coloring to observe changes.
- Demonstrate using pipettes to carefully add drops of food coloring to a hair sample.
- Children take turns applying different food colors to the hair samples in their cups.
- Observe and discuss any changes the dye causes to the hair's appearance.
Variations:
- Pretreat some hair samples with products to compare dye absorption.
- Practice color mixing by combining different food coloring colors on samples.
- Include samples representing diverse hair textures, qualities and ethnicities.
11. Creating "Favorite Things" Science Collages
Overview: Identify and discuss the physical properties of favorite foods and objects through collage projects.
Materials Needed: Magazines, child-safe scissors, glue, construction paper
Setup:
- Set out magazines, scissors, glue and construction paper at tables.
- Optional: Prepare property labels like "solid," "living," etc.
Instructions:
- Discuss examples of physical properties children may observe, like color, texture, shape.
- Children search through magazines and cut out pictures of their favorite foods/objects.
- Children glue their selected images to a large sheet of paper to make a collage of "favorite things."
- Use the collages to analyze the physical properties of each component.
Variations:
- Focus discussions on categories like living/non-living or solid/liquid.
- Label the collages with describing words detailing properties.
- Include scientific illustrations or photographs for inspiration.
How to Make Fun Self-Portrait Art Projects for Preschoolers
Self-portrait art is a timeless way for preschoolers to visually celebrate their self-identity. These engaging activities introduce self-representation through hands-on projects where each child will make a handprint portrait exploring skin tone diversity or a full-body silhouette brought to life with decorative details. The creative opportunities boost self-esteem and self-awareness.
Creating one-of-a-kind self-portrait collages allows preschoolers to artistically express their individuality. These mixed media projects using cut-outs from magazines, fabric scraps, natural materials and more encourage creative self-reflection. Children design unique representational art showcasing their personalities, interests and physical traits.
12. Handprint Portraits with Different Colors
Overview: Use handprints in various skin tone colors to celebrate diversity through self-portrait artworks.
Materials Needed: Paper, skin-tone washable paint colors, paint brushes, paper plates/palettes, baby wipes
Setup:
- Pour different paint colors representing skin tones onto paper plates or palettes.
- Have baby wipes available to clean hands between colors.
Instructions:
- Discuss that everyone has unique and beautiful skin colors.
- Children select paint matching their skin tone and make handprint impressions on paper.
- Use the handprints as a base to add facial features using the same or additional colors.
- Share and appreciate how everyone's handprint portrait art is special.
Variations:
- Add other materials like yarn, pom-poms or googly eyes for extra details.
- Make full body handprint artworks to represent their whole selves.
- Create handprint artworks side-by-side to highlight diversity and togetherness.
13.Using Collage Materials for Unique Self-Portraits
Overview: Construct one-of-a-kind self-portrait collages by arranging a variety of cut-out materials.
Materials Needed: Drawing paper, glue, child-safe scissors, magazines, fabric scraps, natural materials
Setup:
- Gather and set out assorted materials children can cut or tear like magazines, fabric, leaves, etc.
- Provide glue, scissors and paper at the tables.
Instructions:
- Introduce the idea of creating unique "all about me" self-portrait collages.
- Children choose cut-out materials representing their hair, eyes, clothes, etc.
- On the paper, children arrange and glue their selected materials into self-portraits.
- Add additional materials to decorate their portrait once the base is assembled.
Variations:
- Use pre-drawn body outlines for children to fill in with collage materials.
- Incorporate textural materials like sandpaper, pipe cleaners, pom-poms, etc.
- Assemble full-body portraits instead of just facial features.
14. Self-Portrait Silhouettes
Overview: Create unique self-portraits by tracing body silhouettes and decorating the outlines.
Materials Needed: Large pieces of paper, colored pencils or crayons, scissors, decorative materials (magazines, fabric, etc.)
Setup:
- Roll out long pieces of paper on the floor or against a wall.
- Set out colored pencils or crayons and decorative materials.
Instructions:
- Children lie down on or stand against the paper while a partner traces their body outline.
- After outlines are traced, children cut out their silhouette shapes.
- They decorate the silhouettes using drawing materials and collage elements to represent themselves.
- Children present and describe their finished self-portrait silhouettes.
Variations:
- Create group silhouette scenes by cutting and arranging multiple outlines together.
- Use the silhouettes as character inspiration for storytelling or puppet shows.
- Try body tracing with different poses beyond just lying down/standing.
15. Preschool Me vs. Future Me Drawings
Overview: Compare self-identity now versus future aspirations through drawings. It's a great idea to do this activity with students at the beginning of the school year and repeat it at the end of the year to compare their representations and dreams.
Materials Needed: Drawing paper, coloring/writing utensils, document cameras (optional)
Setup:
- Provide paper and age-appropriate drawing/writing tools at student stations.
- Have a projector or other way to allow for sharing drawings.
Instructions:
- Engage in a discussion about how we all grow and change over time.
- On one side of the paper, students draw themselves currently as a preschooler.
- Then, flip to the opposite side to illustrate what they dream of being when older.
- Allow each child a chance to explain both their present/future selves.
- Notice similarities and differences between the collective preschool and dream portraits.
Exploring Family Heritage and Cultural Identity
Engaging preschoolers with activities focused on family heritage and cultural backgrounds nurtures self-discovery and appreciation for diversity. Children celebrate family traditions, ethnic origins, global cultures and their unique ancestries through crafting heritage boxes, multi-cultural stories and more.
16. All About My Family Tree
Overview: Design and decorate a family tree showing important people in their lives.
Materials: Green construction paper, brown craft paper, scissors, glue, photos and decorations
Setup:
- Provide green and brown construction paper for children to create tree bases.
- Set out photos of family members plus decorative materials at tables.
Instructions:
- Children cut out a tree trunk from brown paper and branches from green paper.
- Glue the trunk and branches onto a fresh paper to build their family tree outlines.
- Children glue photos of themselves and family members as "leaves" on the branches.
- Use remaining materials to decorate the trees with patterns, names, etc.
Variations:
- Incorporate handprints or footprints as decorative leaves on the tree.
- Include friends, teachers or other important people in their lives.
- Use the trees for storytelling about their unique families.
17. My Heritage Trunk
Overview: Celebrate family cultures by filling boxes with meaningful objects, favorite items and valued traditions.
Materials Needed: Shoeboxes or trunks, decorating supplies, personal or cultural artifacts
Setup:
- Set out boxes for each child to decorate as their "Heritage Trunk."
- Have students bring in or create items representing their family heritage.
Instructions:
- Discuss how our backgrounds give us unique traditions we can celebrate.
- Children decorate the outsides of their trunks using cultural patterns/symbols.
- Fill trunks with objects like photos, recipes, clothing, instruments and artifacts.
- Share their heritage trunk contents while teaching about family origins.
Variations:
- Make passports or heritage drawings to include in the trunks.
- Host a Heritage Celebration walking museum where children share the filled trunks.
- Include audio or video recordings of traditions like dances, songs or stories.
18. My Dream Destinations
Overview: Explore world cultures by discussing dream travel destinations.
Materials Needed: World map or globe, pictures of travel destinations, art materials
Setup:
- Have a large world map or globe available to point out locations.
- Provide cultural pictures of potential destinations for inspiration.
- Set out craft materials like markers, scissors and construction paper.
Instructions:
- Show pictures highlighting diverse cultures around the globe and allow reactions.
- Ask children if they could travel anywhere, where would their dream destination be?
- Children draw pictures or make postcards depicting that special place.
- Share completed artwork and locations, marking them on the world map.
- Brainstorm and list unique traditions or aspects of each destination.
19. Family Self-Portrait Silhouettes
Overview: Cut intricate silhouette portraits of each family member in a scene.
Materials Needed: Large roll paper, scissors, markers or crayons, decoration materials
Setup:
- Tape a large roll of paper to the wall or floor at child height level.
- Set out child-safe scissors sharp enough for cutting profile outlines.
Instructions:
- Explain the concept of profile silhouette portraits showing just form outlines.
- Model having a child pose in profile view while tracing their outline shape.
- Children take turns posing while a partner carefully cuts their profile shape.
- Once all family members' silhouettes are cut, arrange into a collaborative scene.
- Use materials to add details within each portrait, including facial features.
Variations:
- Instead of full profiles, make simpler half-body or just face shape silhouettes.
- Create a night scene using black paper and adding plastic light shapes.
- Have students create accompanying descriptive stories about the portrait.

Nurturing Emotional Intelligence and Self-Awareness
A critical part of self-identity is understanding one's ever-changing feelings and emotional landscape. These preschool activities build emotional intelligence and self-awareness using age-appropriate feelings-related vocabulary, emotion management techniques like and mindfulness practices to honor their inner experiences through self-expression.
20. My Feelings Mask Making
Overview: Design and decorate masks representing different feelings and emotions.
Materials Needed: Paper plates, elastic strings/pipe cleaners, decorative materials (feathers, pom-poms, etc.)
Setup:
- Set up paper plates, elastic/pipe cleaners and assorted decorative materials on tables.
- Find examples of emotions expressed on masks to use as prompts.
Instructions:
- Discuss different feelings like happy, sad, angry, etc. and their expressions.
- Children select a feeling and decorate a paper plate mask to depict that emotion.
- Once finished, children attach elastic or pipe cleaners to wear their masks.
- Take turns presenting their masks and acting out the emotional expressions.
Variations:
- Have children first mask their own neutral expressions before decorating plates.
- Turn it into a guessing game where others try to determine each mask's emotion.
- Use the masks as storytelling props to act out different scenarios.
21. My Feelings Emotion Rocks
Overview: Decorate rocks to represent different emotions for emotional intelligence practice.
Materials Needed: Smooth rocks, acrylic paints, paintbrushes, water cups for rinsing
Setup:
- Set out rocks, paints, brushes and water cups on tables or outdoors.
- Review examples of emotional expressions to guide rock decorating.
Instructions:
- Explain how we all experience many feelings like happy, sad, angry, etc.
- Children select a rock and choose an emotion to depict through colors/designs.
- As they paint, discuss personal experiences when they've felt that particular emotion.
- Allow rocks to fully dry before handling the Emotion Rocks collection.
Variations:
- Use other materials like markers, googly eyes or pom-poms for decorating.
- Tell stories by arranging multiple emotion rocks in different scenarios.
- Play emotion guessing games by acting out feelings for others to identify.
22. My Senses Exploration Stations
Overview: Set up themed stations allowing children to experience each of the five senses.
Materials Needed: Vary based on stations: textures, smells, taste-safe items, visuals, sounds
Setup:
- Arrange five distinct stations, each focused on one of the five senses (touch, smell, etc.).
- Place corresponding exploratory materials at each sense station.
Instructions:
- Introduce and discuss each of the five senses and how we use them.
- Children rotate through stations using the provided materials to explore that sense.
- At each station, describe how you're using that sense and make observations.
- Optionally, record reactions by drawing pictures or making tally marks.
Variations:
- Include blindfolds at certain stations to heighten other senses.
- Add sensory balloons with objects, smells or sounds hidden inside to identify.
- Create thematic stations around foods, nature items or different textures.
23. If I Were an Animal... Role Play
Overview: Explore imagination and empathy by pretending to be a favorite animal.
Materials Needed: Examples of animal pictures or books, open play space or dramatic play area
Setup:
- Clear an open area for safe human "animal" movements and role play.
- Optional: Provide animal masks or tails for dressing up.
Instructions:
- Ask children to choose their favorite animal they'd like to pretend to be.
- One at a time, a child acts out the animal through sounds and motions.
- Others try guessing which animal is being portrayed based on the hints.
- Once guessed, the actor shares why they admire and chose that animal.
Variations:
- Brainstorm a list of adjectives describing the animals as a warm-up.
- Act out an improv story putting all the animal characters together.
- Turn it into a game of "Animal Charades" for teams to guess.
24. Discovering My Personality Colors
Overview: Children explore basic personality types through colors and traits.
Materials Needed: Color cards, personality "color" descriptions, coloring pages
Setup:
- Prepare simple color cards (red, blue, yellow, green) and descriptions.
- Have coloring pages or paper available for individual free coloring.
Instructions:
- Discuss how colors can relate to different personalities and temperaments.
- Share descriptions of common personality color types like red (energetic).
- Ask questions about which color traits students relate to the most.
- Children then freely color on provided pages using colors matching their feelings.
- Reflect together on how our insides are as vibrant as the colors we chose!
Variations:
- Extend the metaphor with color mixing for combined personality blends.
- Use personality colors to organize and form teams, create name tags.
- Let children design their dream classroom split by color zones.
25. All About My Emotions Bingo
Overview: Reinforce emotional intelligence through interactive emotion bingo games.
Materials Needed: Bingo cards with emotion images, bingo markers/tokens
Setup:
- Create bingo cards with a variety of simple emotion images in the square spaces.
- Prepare enough bingo markers or tokens for all players to use on their cards.
Instructions:
- Pass out one bingo card to each player and go over the emotion faces.
- Draw emotion images one by one, calling out the corresponding feelings.
- Players locate any matching images on their cards and cover with markers.
- First player to completely cover a full row calls out "Bingo!" and wins.
- Discuss what situations make us experience each emotion that's been drawn.
Variations:
- Use emotion word cards instead of images and read the descriptions.
- Create bingo cards themed by color to represent general feelings.
- Play blackout bingo covering the whole card for extra practice.
26. Sculpting My Feelings Monsters
Overview: Construct silly "Feelings Monsters" out of playdough to explore emotions.
Materials Needed: Playdough (multiple colors), google eyes, pipe cleaners, toothpicks
Setup:
- Set out playdough in multiple colors, along with add-ons like googly eyes.
- Find examples of "feeling monsters" or emotion characters to use as inspiration.
Instructions:
- Discuss different emotions like happy, sad, angry, etc. and their expressions.
- Show examples of feeling monster characters and how expressions are exaggerated.
- Children select one or two playdough colors for their feeling monster's emotions.
- Use playdough to sculpt monster bodies and facial features showing that feeling.
- Add extra decorations like eyes, horns, etc. to make the monsters wacky and fun.
Variations:
- Provide other craft materials like pom-poms to incorporate into the sculptures.
- Instead of monsters, shape characters like feeling buddies, emotes or aliens.
- Put the feeling monsters into short skits or performances exploring emotions.
Discovering Unique Interests, Talents and Dreams
Imaginations run wild as preschoolers tap into their unique interests, talents and aspirations through inventive art projects and dramatic role-play. From career drawings to designing their ultimate fantasy selves, these easy ideas for engaging activities encourage creative vision, goal setting for personal dreams and celebrating each child's special gifts.
27. All About Me Bag Decorating
Overview: Customize paper bags to represent themselves, filling them with cherished items. You can use this activity when children come back to school, to help the introduce or reintroduce themselves to classmates.
Materials Needed: Paper bags, crayons/markers, decorative materials (stickers, stamps, etc.), personal items
Setup:
- Set out paper bags at each child's spot with markers, crayons and decorations.
- Have a separate bin for children to gather and bring personal items.
Instructions:
- Introduce the "All About Me Bag" concept for collecting meaningful belongings.
- Children decorate the outsides of their bags with drawings, patterns and materials.
- Once finished decorating, children gather small, safe items meaningful to them.
- Share the reasons behind why each included belonging is special.
Variations:
- Focus the bag contents on a theme like favorites, talents or dreams.
- Turn it into an ongoing project bag that kids take home and add to.
- Create smaller bags or envelopes with written self-descriptions inside.
28. My Dream Career Drawings
Overview: Children use drawings to depict and describe their dream career ambitions.
Materials Needed: Drawing paper, crayons or colored pencils
Setup:
- Set out paper and drawing utensils at each child's spot.
- Optional: provide examples of career drawings or uniforms as prompts.
Instructions:
- Lead a discussion about different careers students may aspire to have when older.
- Children think about what job they'd most like and draw themselves in that role.
- Once finished drawing, children describe what career they chose and why.
- Share dreams with partners or the whole group.
Variations:
- Dive deeper by having kids describe daily job tasks after career introductions.
- Create paper uniform props like hats, vests, badges to accompany drawings.
- Extend into dramatic play by acting out the career roles together.
29. All About My Unique Fingerprints
Overview: Explore how we each have special, unique fingerprints that identify us.
Materials Needed: Inkpads or washable stamps, magnifying glasses, drawing paper
Setup:
- Set out inkpads or stamp pads and paper at each student's spot.
- Have magnifying glasses available to closely examine fingerprint patterns.
Instructions:
- Explain how our fingerprints are formed and how each person's fingerprints are unique.
- Show examples of the three main fingerprint pattern types (whirls, arches, loops).
- Children press fingers into inkpads and make prints on their paper.
- Use magnifying glasses to inspect and identify each fingerprint pattern.
- Compare findings and appreciate how we're all distinct from one another!
Variations:
- Make fingerprint drawings by overlapping and combining prints into scenery.
- Gather people's fingerprints to analyze the most common types in your class.
- Add fingerprint names and graph data comparing fingerprint types on each finger or between genders.
30. My Favorite Book Character
Overview: Celebrate literary love by dressing up and acting as a beloved book character.
Materials Needed: Costumes, props, copies of corresponding books, simple puppet stage
Setup:
- Gather any available costumes, props and book copies related to popular characters.
- Prepare a basic puppet stage area using tables, curtains or presentation boards.
Instructions:
- Discuss favorite book characters and share what makes each one special.
- Children choose a book character to portray and prepare costumes and props.
- Use the puppet stage for solo performances acting out the chosen character.
- Audience members try to guess which book character is being portrayed.
Variations:
- Host a character parade or runway walk highlighting each book role.
- Work in pairs or groups to act out scenes cooperatively.
- Create paper bag puppets or costume masks for alternative portrayals.
Building Positive Self-Identity and Confidence
Establishing a positive self-identity and nurturing confidence from an early age is crucial for lifelong self-esteem and resilience. Preschool self-activities focused on affirmation crafts, tracing signature lines and celebrating incredible abilities set the foundation for appreciating their growing individuality through positive self-talk. The goal is to learn ways that children are different or similar and how each child is special.
31. All About Me Time Capsule
Overview: Fill decorated boxes with important objects to represent themselves at this age.
Materials Needed: Shoeboxes, decorating supplies, special trinkets or drawings by children
Setup:
- Set out shoeboxes, coloring supplies, stickers, etc. for decorating at tables.
- Have children bring in or create small objects meaningful to them.
Instructions:
- Explain the time capsule concept for preserving important items.
- Children decorate the outsides of their shoeboxes with drawings and embellishments.
- Each child selects a few special belongings and places them in their box.
- Optionally, include a self-portrait or description to commemorate their current age.
- Time capsules are closed up to be opened again at an older age.
Variations:
- Create class-wide time capsules by combining individual items into larger containers.
- Make miniature time capsules using smaller boxes or envelopes.
- Incorporate interview questions about their interests, dreams, etc. to include.
32. My Walking Signature Line
Overview: Children create and memorize their own unique signature line designs.
Materials Needed: Long sheets of mural paper, markers or crayons, tape
Setup:
- Tape long pieces of mural paper to the floor or walls at child height level.
- Set out markers, crayons or other writing utensils at intervals.
Instructions:
- Explain how each person has their own special signature design when writing names.
- Model creating a simple but unique line squiggle as your "signature line."
- One at a time, children use the materials to freely draw their signature line.
- Once all lines are drawn, have children attempt to walk the line "signing" their way.
- See if others in the class can determine whose signature line path they walked!
Variations:
- Add obstacles to walk around or stepping stones within the line design.
- Create temporary signature lines using materials like yarn, tape or chalk.
- Turn it into a signature dance where bodies form the squiggly lines!
33. Discovering My Personality Pals
Overview: Explore personal traits by designing representational stuffed animal characters.
Materials Needed: Paper bags, crafting supplies like pom-poms, fabric scraps, etc.
Setup:
- Set out brown paper bags to use as the base for stuffed animal creations.
- Provide a variety of decorating supplies like pom-poms, pipe cleaners, etc.
Instructions:
- Engage in a discussion about what sorts of traits make up our personalities.
- Highlight how animals are often used to personify different character qualities.
- Children think about personality words that describe themselves best.
- Using the supplies, they design a special stuffed "personality pal" reflecting this.
- Students can name their pals and share what each part or decoration represents.
Variations:
- Attach written descriptive words to each stuffed animal highlighting its traits.
- Make multiple pals showing different aspects of one's diverse personality.
- Swap stuffed pals anonymously to see if others can determine the intended traits.
34. All About My Dreams Cloud Art
Overview: Create textured cloud sculptures visualizing hopes, dreams and ambitions.
Materials Needed: Inflated balloons, liquid starch, toilet paper or napkins, decorations
Setup:
- Blow up some balloons and set out bowls with liquid starch/Mod Podge.
- Provide shredded paper, napkins or tissue paper to cover the balloons.
- Have decorative elements like pom-poms, glitter, etc. available.
Instructions:
- Discuss hopes and dreams, sharing some cloud-themed books beforehand.
- Children pick up balloons and show them how to cover with the papier mâché.
- Between papier mâché layers, decorate with materials representing dreams.
- Once covered and decorated, pop balloons inside to create cloud sculptures.
- Children explain what the objects inside their dream clouds symbolize.
Variations:
- Make mobiles by attaching the dream clouds sculptures to drifting strings.
- Add written affirmations or quotes to the clouds about perseverance.
- Fill some clouds with small items representing hobbies or career aspirations.
Free Printable All About Me Form and Worksheets
Looking for a free printable form to simplify the first week of school? We built the perfect tool for working with small groups and the whole classroom. Access the free guide here!
Get 100+ Editable and Printable Templates for Almost Every Preschool Situation

We know preschools like yours are busy. That's why we made dozens of templates to help you manage the various aspects of your organization. With billing and invoicing, activity templates, forms and even marketing materials, we have it all. Download all 100 today!