- Who We Serve
- Schools & Community Education
- K-12 Schools
- Payment Processing
With Vanco's online school payment system, you can accept fees for a variety of activities including...
Child Care
Athletics
Apparel & Merchandise
Technology Fees
Food Service
Registrations
Transportation
Activity & Class Fees
Make Online Payments Simple
Join over 1,300 districts that have effortlessly transitioned from perplexing school fee payment systems to a streamlined software that allows them to...

Keep technology simple
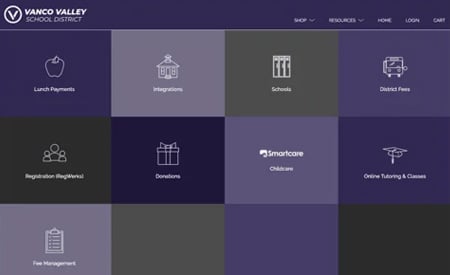
Let parents easily pay for everything, from spirit wear, school lunch, activity fees, child care and more from one central location using Vanco's online school payment system. School staff can consolidate reporting and reduce the reconciliation process to 10 minutes or less.

Integrate with other district software and streamline the reconciliation process
With over 25 partner integrations and counting, including Skyward and PowerSchool, Vanco offers a seamless school payment solution for districts. Vanco provides simple tools to support financial reconciliation for school meal payments, registration fees and many more online school fees. Vanco’s platform offers a one-stop shop for all payments and fees.

Cut down on office call volume
Allow families to self-serve by paying online through our Web Store. Free staff from fielding time-consuming calls and emails with a solution that offers integrated payments of school expenses. Staff and parents can track school payments for cafeteria accounts, online school fees and other miscellaneous payments. This comprehensive and transparent system ensures everyone knows where they stand on fees and payments.

Go cashless and paperless
Build toward a cashless (and paperless) campus, bringing all your administrative and payment technology together under one vendor. Use our school payment system software for efficient and transparent automatic payments, registrations, online school fees, late payment fees and more! The system offers a variety of payment types and payment options to meet parents’ needs.

Take fundraisers to the next level
From ticket purchases to generous donations, everything converges at one central hub. With effortless payments and streamlined sign-ups, parents and community members enjoy a hassle-free experience, making support for schools more accessible and engaging than ever.
Say goodbye to time-consuming DIY and difficult onboarding
No DIY, no cost. Vanco's dedicated specialists guide your district from sign-up to a streamlined school payment system. We carefully craft your Web Store to meet your needs, and Vanco's ever-present Client Services team ensures continuous, effortless operations. Dive in fast, and swim effortlessly.

Enjoy detailed and consolidated reporting
Vanco empowers schools with precision reporting tailored to your distinct needs. From monthly statements to intricate transaction details, everything's consolidated in one hub, with streamlined payment dashboards. Sync Vanco effortlessly with favored tech solutions, including your SIS, for a harmonized, comprehensive, and transparent view of all school payments.

Airtight security to protect your school and its students
Fully encrypted and PCI-compliant, we meet the zenith of credit card processing standards. Every transaction is shielded, granting admins peace of mind that students' and parents' card payment details remain secure.

Access exceptional customer care, every time
Experience Vanco's white-glove customer care, where unparalleled support meets swift solutions. Our 98% satisfaction score reflects our commitment. With custom builds in under two days, timely training materials and responsive support, we elevate your journey to a cashless campus, ensuring every step is seamless.
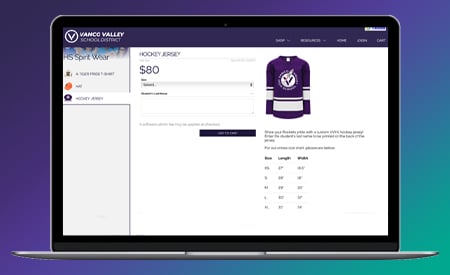
Unlock a new source of funding with an online store
From school spirit wear to essential supplies, make your merchandise available around the clock. Drive revenue effortlessly, channeling funds directly into pivotal K-12 programs, all while celebrating school pride. Choose Vanco and let your school’s spirit shine — day or night.

In-person Payments
Vanco RevTrak makes in-person payments effortless, allowing families to pay their way—right from the palm of their hand. Accept all major payment methods, including swipe, chip, and tap transactions, as well as digital wallets like Apple Pay and Google Wallet, ensuring a fast and convenient checkout experience.
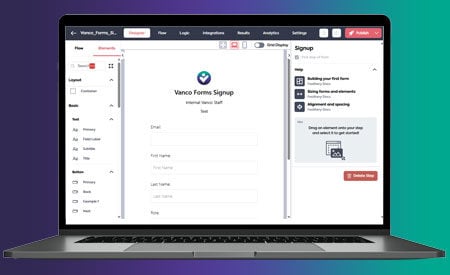
Simplify Student Data Collection and Payments
Vanco’s RevTrak Forms makes it easy for schools to collect student information and payments through intuitive online forms. Staff can effortlessly create, launch, and manage forms for registrations, permissions, and more—all in one centralized platform.
Cut down on paperwork, minimize errors, and streamline inventory tracking, all while saving time for both your team and the families you serve.
Comprehensive Features of RevTrak’s Payment System
Centralized Payment Processing
School fee payment platforms that don’t offer centralized payment processing cause frustration as families have to pay different fees in different places. This takes up time and makes the entire process more difficult not only for those families, but also for your staff. RevTrak eliminates those headaches by bringing all fee payments together in one place, streamlining the process so families can navigate it more easily and staff spends less time on processing.
Multiple Payment Methods Accepted
RevTrak allows you to accept payments for school fees via multiple payment methods, including credit card, ACH transfer, digital wallet and check. By providing multiple options for families to pay, our platform helps you collect payments and avoid hassles with families who need to pay using a specific method.
Integration with Student Information Systems (SIS)
An integrated tech stack is vital for schools in order to save time, increase efficiency and accomplish everything they need to do to set students up for success. RevTrak is built to integrate seamlessly with leading Student Information Systems tools, allowing you to connect the different components and resources you use to keep your district running smoothly on a daily basis.
Real-Time Financial Reporting
Real-time financial data is an important tool for the administrative team in any district. You need to be able to pull reports, reconcile data and know exact figures in order to make key decisions and with RevTrak, you can – all in mere minutes. Compared to other reporting tools, you’ll spend a fraction of the time on pulling the information you need to make informed, well-supported decisions.
Benefits of Implementing RevTrak in Educational Institutions
Streamlined Administrative Operations
Administrative staff always have a lot on their place, which means saving time is hugely beneficial. Schools that implement RevTrak are able to cut hours off their normal time for admin work, which frees staff up to focus more of their time and energy on tasks and projects that help drive student success and elevate the entire district.
Enhanced Parent and Guardian Engagement
Communication and engagement with parents and guardians can be tough. Not every parent or guardian communicates well or is actively involved with their child’s school life on a daily basis, but RevTrak’s communication and connection tools help your district communicate easily and effectively, increasing the likelihood of these families playing a more active role in what’s going in with their child in the classroom, cafetera, school club or sports team.
Increased Financial Transparency and Compliance
Keeping in compliance with local, state and federal rules and regulations is a must for schools, so RevTrak helps you more readily follow these steps and procedures. It also empowers you to be as transparent as possible with your finances, which increases confidence for families and your school community while also building trust in your district’s staff and how it handles its finances.
Integrations
We can integrate with your existing tech stack. See some of our current partners below.









.png)


.png)


Vanco: More Than an Online School Payment Tool
For over two decades, Vanco has received accolades for expertly streamlining school payments and online school fees, saving staff precious hours of work. But that’s not all Vanco can do. Take a glance at our comprehensive school solutions built to simplify your staff’s work!

Web Store
Schools and districts that use the RevTrak Web Store to simplify payments can cut down on paperwork and reconcile payments in 10 minutes or less.
Learn more
Cafeteria Management
Let families make meal account payments from anywhere, at anytime. We make your schools’ cafeteria management easy.
Learn more
Before and After Care
Vanco's Smartcare makes child care program management easy. Save time, empower staff and delight the families that depend on you.
Learn more
Online event ticketing
Event software made for schools makes it easy to create events in minutes and start selling tickets online for any school event.
Online registrations
Make it easy for your community to register for classes and pay registration fees.
Community, adult education and after-school enrichment
With software tailored for adult and after-school enrichment programs, Vanco simplifies program management from registration to delivery.
Security and Compliance Standards
Data Protection Measures
It’s imperative that your data protection measures are as strong as possible, giving your district’s families confidence that their information is safe. With 25-plus years serving schools, RevTrak’s secure platform is engineered to the highest security standards, helping keep that data protected and providing peace of mind for parents, guardians and staff.
Adherence to Payment Card Industry Data Security Standards (PCI DSS)
PCI DSS is the security standard established by the major credit card companies for institutions that handle financial and payment data and RevTrak is certified compliant to these standards. Its tools are kept current and up-to-date with these standards and can be counted on to safeguard payment information within your system.
Top to Bottom:
School Staff Unanimously Trusts Vanco
Listen to Stories From Some of the 1,300 Districts That Chose Vanco!

CFO Sarah
Discover why one of the fastest growing school districts in the country relies on Vanco to meet increasing demands.

Director of Finance Cindy
Cindy’s district needed a more efficient way to collect payments. See how Vanco delivered.

Director of Technology Nicole
From fundraisers to registrations and payments, Vanco has saved this director countless hours of work.

Athletic Director Julie
See how Julie sold out events and brought in over $16,000 with Vanco’s easy-to-use software.
Online Payment Processing FAQs
-
Vanco accepts debit cards and most credit cards, including Visa, MasterCard, AmEx and Discover.
-
Vanco brings all payments into one place, making it easy for parents to add money to cafeteria accounts, make payments for extracurricular activities and pay any fee (required or optional), including technology fees. For more details, check out this comprehensive FAQ Vanco developed for parents and guardians.
-
Yes! Vanco’s software is highly customizable to meet the needs of school districts of all shapes and sizes. Vanco’s solutions can process payments for all school fees, including fees for tuition, field trips, technology, meals, athletics, event tickets, fundraisers and much more!
-
Easily! Admins can process refund requests and the requesters will see their refunds within 3 to 5 business days.
-
Yes!
-
Reducing cash and check payments makes tracking payments easier, and makes accounting for every penny that much easier as well. By bringing more payments online, there is less opportunity for funds to be misplaced before they arrive at the school admin office or the bank.
-
Vanco is compatible with many software solutions and can be integrated into your existing technology in several ways depending on your district’s needs. Get in touch with a Vanco rep to discuss your district's needs in more detail here.
-
Sure can! With Vanco, you can connect and track as many account codes as you need.
-
Absolutely! You can customize the Web Store with school colors, graphics, mascots and more.
-
Depending on the solution you are learning, we’ve seen clients get onboarded and trained in anywhere from 15 minutes to 2 hours. Some common feedback we receive from clients is just how easy Vanco’s solutions are to use and how helpful our customer support team is when they have questions they can’t solve on their own. Vanco also offers a wealth of self-serve resources and a white-glove customer support to build new items for you, free of charge.
-
Yes! Families can easily track payment history and receipts using Vanco’s solutions.
-
Not at all! Vanco does not have any setup fees or any hidden costs, and we’re all about keeping our costs and fees simple and transparent for everyone.
-
Easily! Get in touch with a Vanco product expert to discuss your district's needs in more detail here.
-
Each school will be given a unique RevTrak Web Store link, which will serve as a centralized hub for all fees, payments and products. If parents ever loose the link, or can't find it on the school's website, they can use our RevTrak Web Store Lookup. All they need to do is enter their school's city and state. From there, the tool will provide the precise link. Parents can also check out our parent FAQ page for more detailed answers on RevTrak and to find their unique RevTrak Web Store link.
See How We Can Make Your Job Easier, One Payment at a Time!
Want to join 1,300+ districts who now enjoy a super efficient payment process? Schedule a demo and witness how we simplify every school payment, all while saving you countless hours!
Want to See How Your School Can Try It for Free?
Sign Up to Claim Your Free Trial!13,000+ Schools Already Use RevTrak
30+ Years Serving Schools
$900+ Million Processed for Schools Each Year
U.S.-Based Customer Support
Other ways to help your school administration
Additional Updates and Resources
Sorry!
No items currently match your filtering criteria.



.jpg?width=450&height=250&name=34-K-12-School-Templates_thumbnail%20(1).jpg)

